

VALENTINE’S Day giving you the urge to show some love? Us too - we’re huge fans of a good old display of affection. The bigger the better, but it has to be stylishly done.
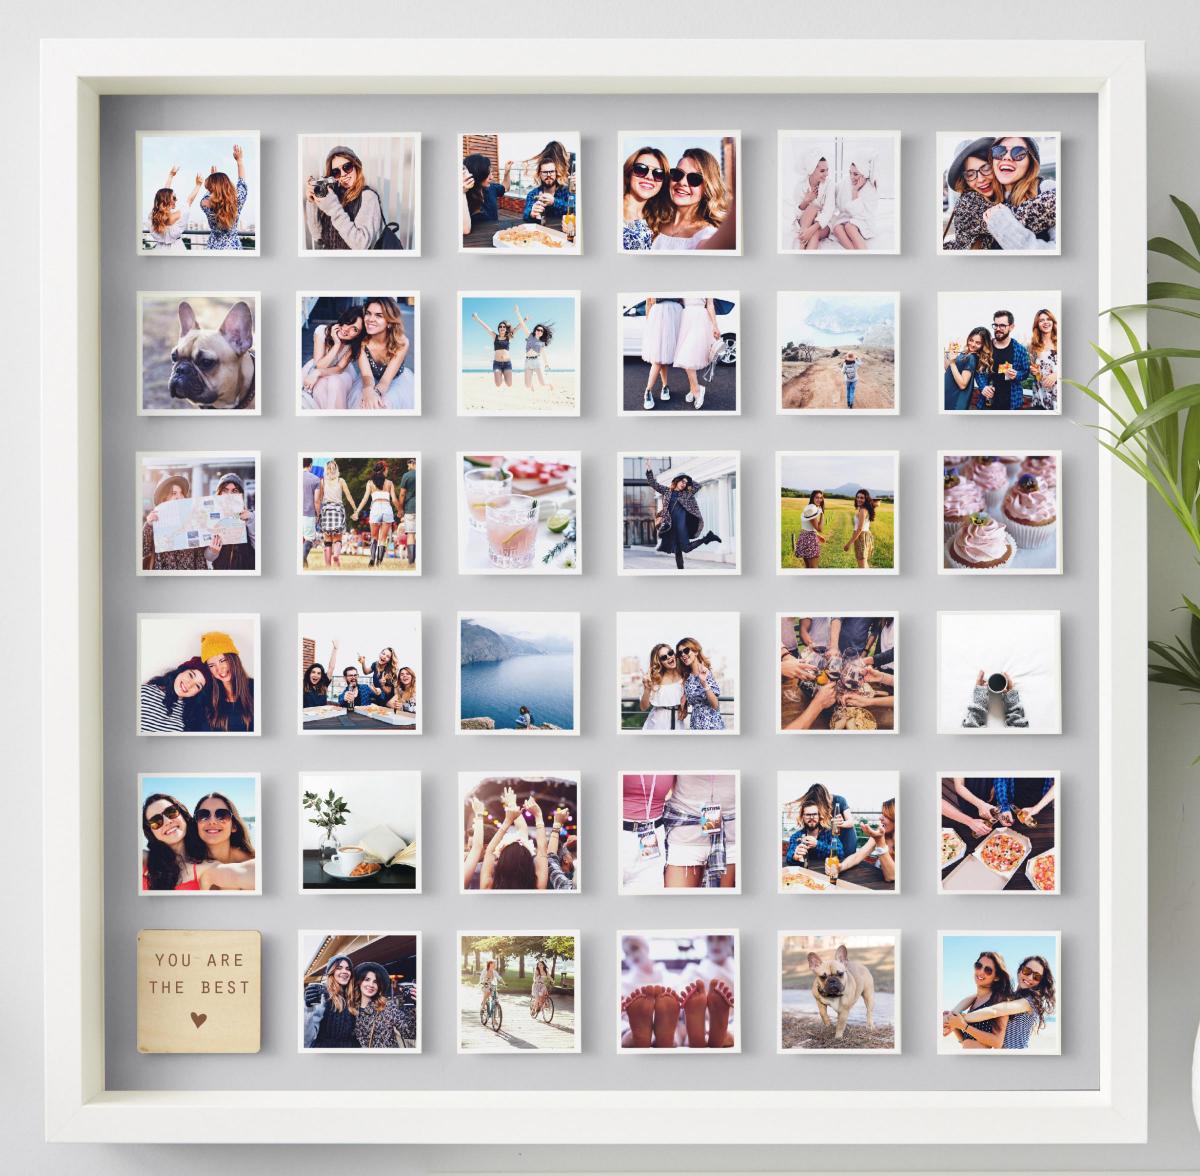
We’re talking about display walls in your home, of course - the perfect way to celebrate your loves (whether that’s photos of your nearest and dearest, pets, or travel memories and favourite prints that make you smile) and score some serious home-style points in the process.
A well-curated display wall can turn a blank space into something that’s both visually striking and a talking point for curious guests, as well as sparking joy for you on a daily basis. But how can you ensure your displays are suitably Pinterest-worthy?
Take time to find the ideal spot
Give some thought to where your display wall is going to be. Remember, it doesn’t just have to be the living room or above the mantelpiece - you’ve got your whole home to work with (although bear in mind if you want other people to see it, of course). “The image wall is such a ‘wow’ feature and can often take a lot of time to get right, so ensuring that you have the right home for it is key,” says Amy Sanders, curator of home, prints and art at notonthehighstreet.com. “Finding an unusual spot which can be ‘uncovered’, can often be just as ‘wow’ as being the focal point of a commonly used room.”
Scour interiors blogs and social media for inspiration; a stairway, that disused spot on the landing, the space around your mirror in the hallway (how lovely would it be to be greeted by your favourite ‘moments’ every time you enter your house?) - explore the options.

• STYLISH: Picture wall above a desk. Picture: Thinkstock/PA
Do some practice runs
Before you start knocking in nails and sticking on adhesive patches, do some dummy runs. “Play around with placements and positions before you start hanging. Get a large bit of floor space and use this as a faux wall to ensure you get the right layout,” suggests Sanders. “Do try multiple variations, and take pictures of your favourites to remember them.”
Channel your inner interior stylist
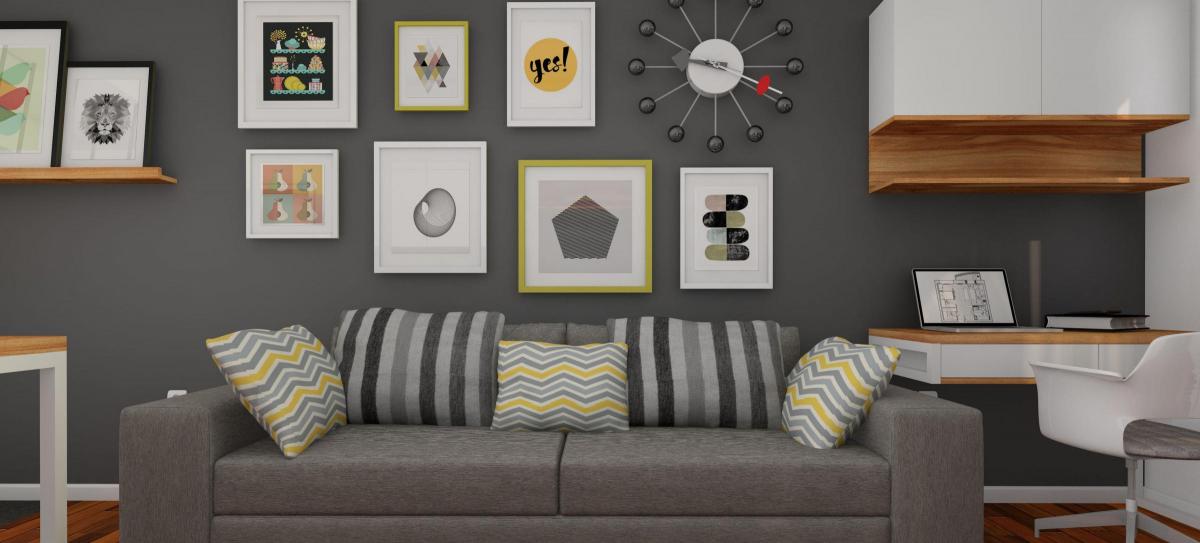
It’s your space, so your rules - spend some time thinking about the ‘look’ you’re after, but don’t be afraid to get creative and experiment. From minimalist and monochrome to marvellously mish-mash, whatever the vibe, the key thing to keep in mind is whether it ‘feels’ balanced, but this doesn’t have to mean perfect symmetry and matchy-matchy (unless you want it to!). “Play with proportions and styles,” suggests Sanders. “This can be done both through the images themselves, as well as the frames - however, you want to ensure there’s a common theme which ties the wall together. This could be done through the image subject, palette or framing.”
Plot and prep
Now, this might sound obvious to some, but it’s a pretty important point and one many of us are guilty of skipping. Once you’ve decided on your frames and positioning, don’t just go guessing or ‘doing it by eye’ when it comes to affixing things to the wall. If you’re going to be drilling and/or banging in nails, or you’re attempting a full-scale gallery-style display wall - which, let’s face it, you’d really prefer not to have to redo from scratch once you realise a couple of the frames are wonky - then don’t skimp on this stage.
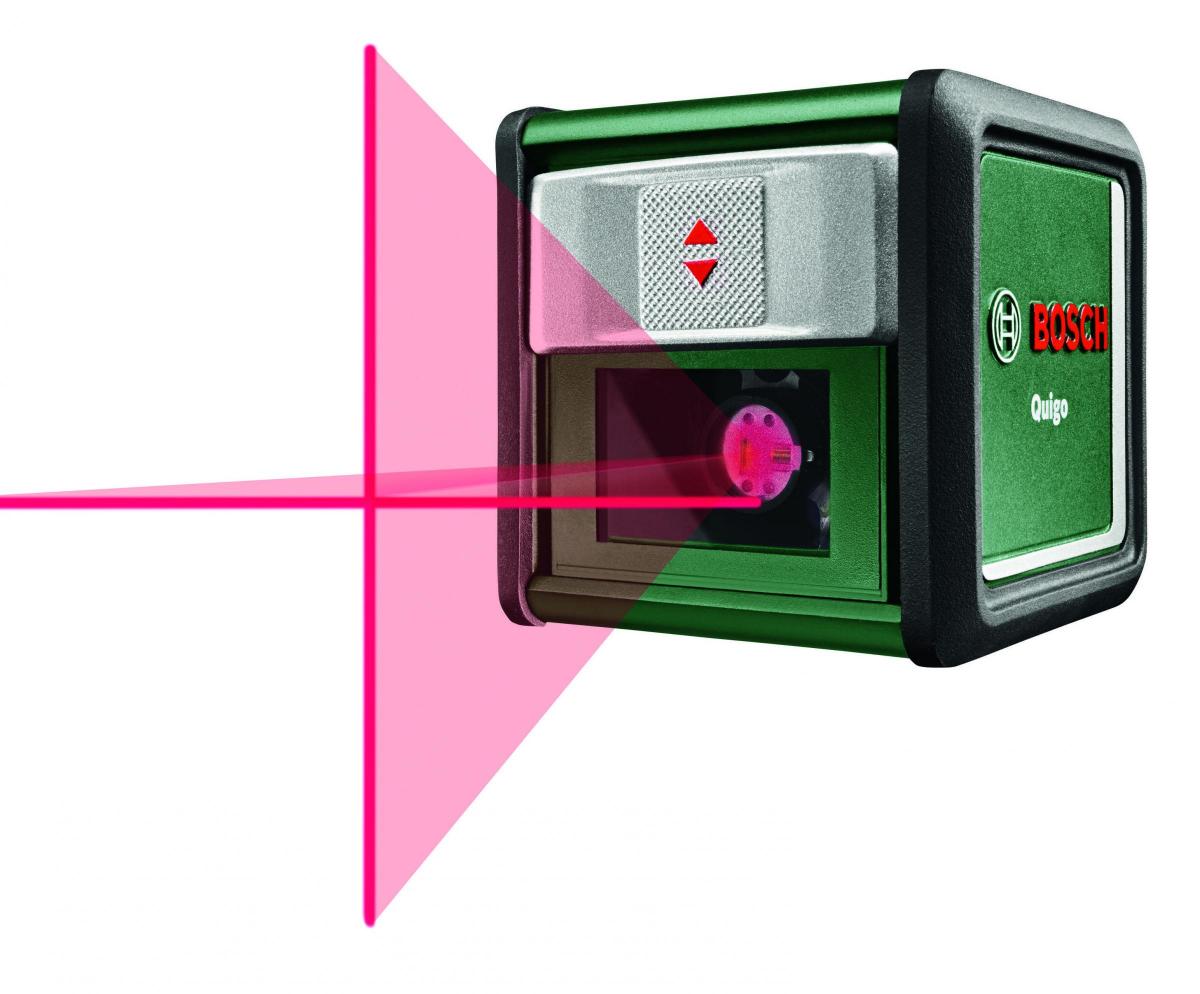
At the very least, a tape measure, perhaps a spirit-level and pencil/masking tape for marking out your guides, plus a second pair of hands and eyes if possible, will help. You’ll also, crucially, need to make sure the area is safe and suitable before you go drilling/hammering. There are even nifty tools out there to make these tasks foolproof. The Bosch Quigo (£55.12, shop.bosch-do-it.com) cleverly projects 100% straight horizontal and vertical laser lines onto your walls, while the Bosch Truvo (£44.09, shop.bosch-do-it.com) can detect live cables and metal objects in walling, so you’ll know where’s safe to drill.
And if you’re renting...
If getting handy with the hammer’s likely to seriously dent your deposit, your options might be more limited, but you can still create displays you love. “Renters can often feel like they’re missing the personal touch of hanging up lots of photo frames, but it’s actually the perfect chance to get creative with your photos! Adorn your windowsills and bookcases with funky desk-standing photo displays, plus add magnetic photo frames to your fridge,” says Rachel Escott, marketing and creative content manager at Red Candy (redcandy.co.uk).
“There are some really effective temporary measures for decorating your wall with photos - such as pegging Polaroids to a piece of string, attached to the wall with washi tape,” adds Escott. “And why not stick photos to your existing home accessories? For example, if you have a beautiful floor-length mirror, then you could decorate the edges with your favourite snaps.”
Or space is severely limited...
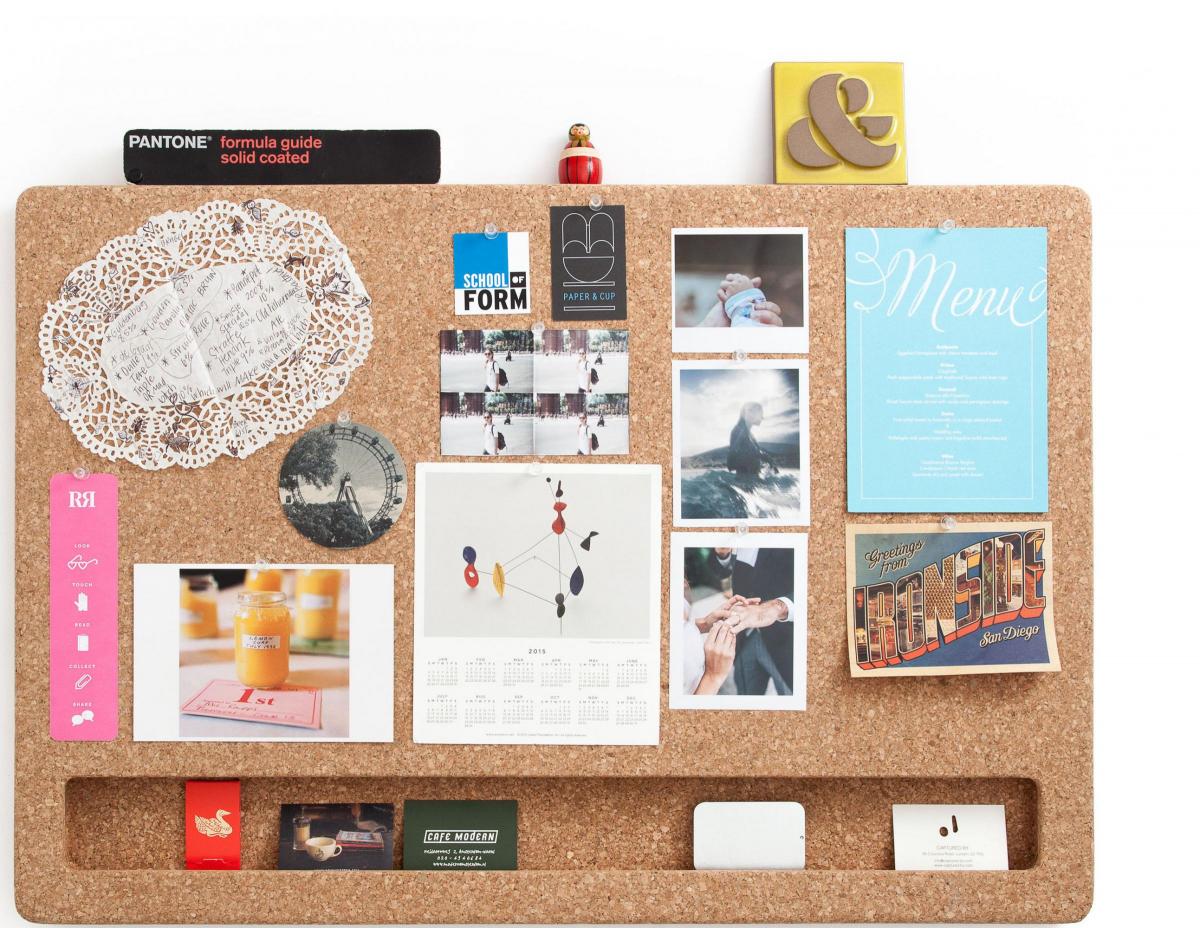
Just don’t have any expanses of wall to work with? “With cosy rooms, it’s important not to distract from the room’s petite size with lots of decor, as it actually has the opposite effect. But it’s still important to keep a personal touch with your favourite photos on display - so stick to a couple of large statement pieces,” suggests Escott. “This could be a large corkboard with a mixture of photos and memories, or a collage-style photo frame where you can easily swap the photos around.” This is another great option for renters, too.


Comments: Our rules
We want our comments to be a lively and valuable part of our community - a place where readers can debate and engage with the most important local issues. The ability to comment on our stories is a privilege, not a right, however, and that privilege may be withdrawn if it is abused or misused.
Please report any comments that break our rules.
Read the rules here